
The goal of this article is to help you setup your Point of Sale (POS) so that it functions properly and effectively in your facility, and it provides you with accurate reporting.
POS Button Groups
Go to the Admin section and then down to Point of Sale, click on Button Groups. The POS groups allow you to set the colors of the buttons on your POS screen. Click on the Add point-of-sale group
Enter the Group Name. You can label it anything you want. To set the color for the group, click the select link and a small pop-up widget will appear. You may either choose a color from the graph, or put a hex code into the field above. After you've made your selection, click Add Group. You will now see the list of all Groups with their colorized buttons.
POS Screens
Go to the Admin page and then click on POS Screens under the Point of Sale section. Then click on Add point-of-sale screen.
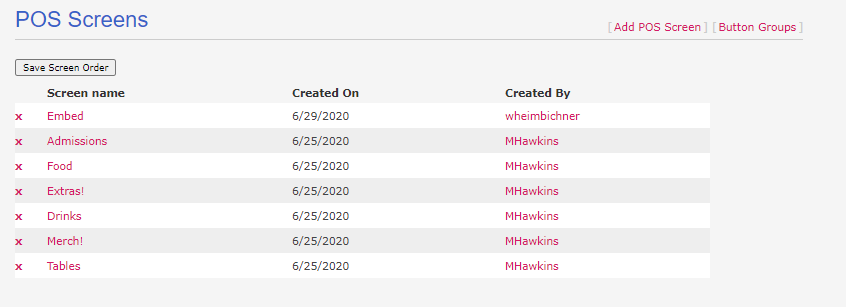
Add point-of-sale screen: Add another screen to the list. If you add more screens than can fit at the top of your point of sale, a Change Screen button will appear giving the cashier access to additional screens.
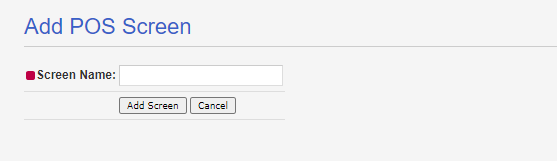
When creating your point of sale screen, you need to give it a name (This can be changed later).
Once you've entered a name, you'll be brought to a new page. It will ask you how you want to arrange your buttons.
Note: It is important that you immediately add a POS button to any screen. If you don't, you won't be able to edit the screen in the future. Always add at least one button when creating a POS screen.

You'll then be brought to a screen that looks something like this:
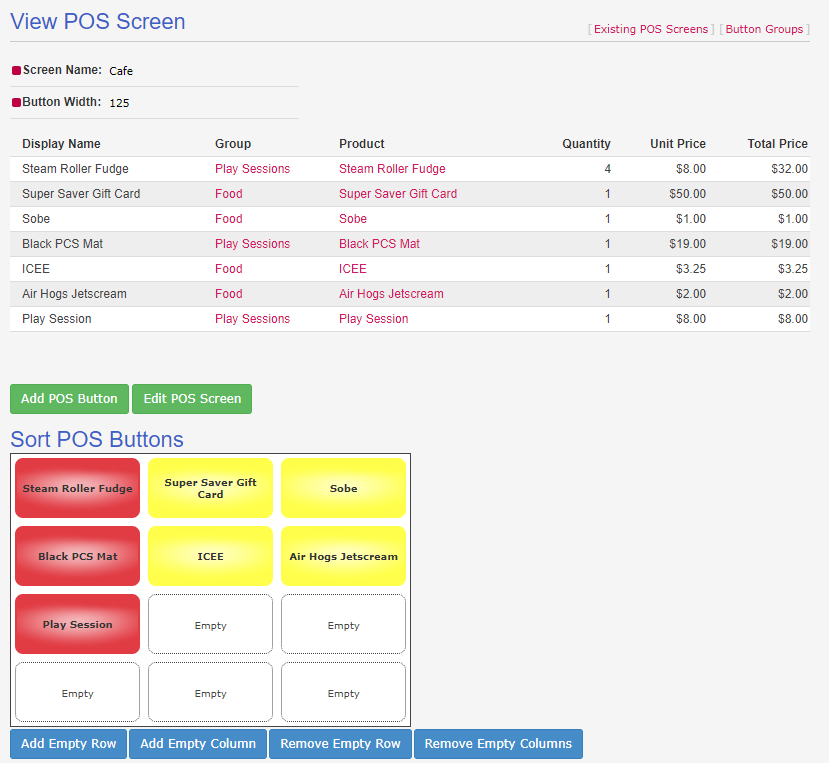
Edit POS Screen: Most of the options on this page require you click this button before they can be modified.
- Screen Name: This is what the screen will be labeled as within the point-of-sale.
- Button Width: The size of your POS buttons (in pixels).
Add POS Button: provides the following form for adding an additional button.
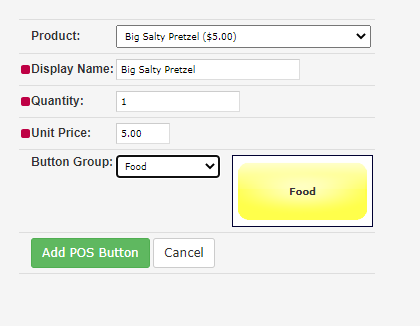
- Product: The item this button points to. It will load that item's price and name by default.
- Display Name: You may change the display name of the product for your POS button, if you wish.
- Quantity: How many of this item will be added to an order by this button.
- Unit Price: The price per unit that this button will add the product for. It will default to the product price, but can be set higher or lower.
- Group: The group (color code) you would wish to assign to this product.
If you have a product which varies in price by quantity or time of day, but want to track it as a single item on your reports, it may prove useful to create multiple POS buttons for the same product. This is why you are able to set the quantity and unit price items separate from the product itself.
Note: Updating a product's price will in the product page will NOT update the POS button. You'll need to edit the button to refresh the new price.
Moving the Buttons
To arrange the way the POS buttons will be layed out on the screen, simply click and drag a button from one position to another. If you need to make the table wider or larger, note the Add Empty Row and Add Empty Column buttons below.